
Karcher K4 Parts Diagram PDF: A Comprehensive Guide
Navigating Karcher K4 maintenance requires readily available diagrams; these PDFs detail components, aiding repairs and ensuring optimal performance of your pressure washer.
The Karcher K4 series represents a popular choice for homeowners seeking effective and versatile pressure washing solutions. Known for its balance of power, portability, and affordability, the K4 tackles various cleaning tasks, from vehicle washing to patio restoration. Understanding its components is crucial for maintenance and repair, and that’s where a detailed parts diagram becomes invaluable.
Karcher offers several K4 models, including Full Control, Premium, and Compact versions, each with slight variations in features and specifications. Regardless of the specific model, access to a K4 parts diagram PDF allows users to quickly identify components, locate replacement parts, and troubleshoot potential issues. These diagrams are essential for both DIY enthusiasts and professional technicians alike, ensuring efficient and accurate repairs, extending the lifespan of this powerful cleaning tool.
Understanding the Importance of a Parts Diagram
A Karcher K4 parts diagram PDF isn’t merely a helpful resource; it’s fundamental for effective maintenance and repair. These diagrams provide a visual breakdown of the pressure washer’s assembly, clearly labeling each component with a reference number. This allows for precise identification of parts needing replacement, avoiding incorrect orders and wasted time.
Furthermore, diagrams aid in understanding how components interact, crucial for diagnosing complex issues. Whether identifying a leak source or troubleshooting pump problems, a diagram streamlines the process. Accessing these diagrams, often available through Karcher’s website or parts retailers, empowers users to perform repairs confidently, saving on professional service costs and maximizing the K4’s operational life.

Key Components & Their Locations
Essential K4 parts—hose, lance, motor, pump, and filter—are visually mapped in diagrams, enabling quick location for maintenance or replacement procedures.
High-Pressure Hose & Connections
The high-pressure hose is a critical component, clearly illustrated in Karcher K4 parts diagrams. These diagrams pinpoint the hose’s connection points to both the pump assembly and the spray lance. Identifying these connections is vital for troubleshooting leaks or performing replacements. Diagrams showcase the various hose lengths available and their corresponding part numbers, ensuring compatibility.
Furthermore, the diagrams detail the quick-connect couplings used for easy attachment and detachment. Understanding these connections allows for safe and efficient hose swapping. Pay close attention to the diagrams when inspecting for wear and tear, as damaged hoses can pose a safety risk. Proper hose maintenance, guided by the diagrams, extends the lifespan of your Karcher K4 pressure washer.
Spray Lance & Nozzles
Karcher K4 parts diagrams meticulously detail the spray lance assembly, showcasing its various sections and components. These diagrams are invaluable when diagnosing issues like reduced spray pressure or uneven spray patterns. They illustrate the different nozzle types – from rotary to fan – and their corresponding applications for diverse cleaning tasks.
The diagrams also highlight the quick-connect mechanism that secures the nozzles to the lance, enabling swift changes. Identifying the correct nozzle and lance parts via the diagrams ensures optimal cleaning performance. Replacement parts, like extensions, are also clearly depicted. Careful study of these diagrams aids in proper assembly and prevents damage during maintenance.
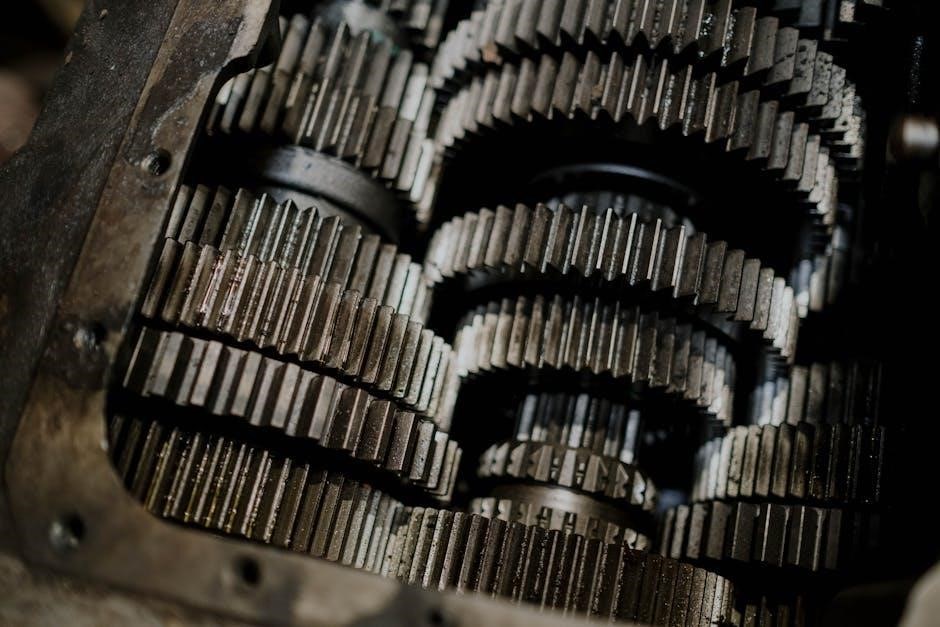
Motor & Pump Assembly
The Karcher K4 parts diagram PDF provides a detailed exploded view of the motor and pump assembly, crucial for understanding its complex internal workings. These diagrams pinpoint each component – from the motor housing and crankshaft to the connecting rod and pump pistons – facilitating accurate identification during repairs.
Understanding the arrangement of these parts is vital for diagnosing issues like reduced pressure, unusual noises, or complete pump failure. Diagrams often include reference numbers for seals, bearings, and other wear-prone components. Accessing these diagrams empowers users to confidently tackle more complex repairs, extending the lifespan of their K4 pressure washer.
Water Filter & Inlet
The Karcher K4 parts diagram PDF clearly illustrates the water filter and inlet system, essential for maintaining optimal pressure and preventing damage to the pump. These diagrams showcase the filter housing, inlet screen, and connecting hoses, allowing for easy identification of each part.
Regular inspection and cleaning of the water filter are crucial, and the diagram aids in disassembly and reassembly. Identifying the correct replacement parts, using the reference numbers provided, ensures compatibility and proper function. A clogged filter significantly reduces performance, so understanding its location and construction via the diagram is invaluable for K4 maintenance.

Accessing the Karcher K4 Parts Diagram PDF
Locate diagrams through the official Karcher website, third-party retailers, or by utilizing your specific K4 model number for accurate results.
Official Karcher Website Resources
Karcher’s official website serves as the primary hub for accessing authentic K4 parts diagrams in PDF format. Navigating to the support section, and specifically the documentation area, allows users to input their exact model number – crucial for pinpointing the correct diagram.
The website often provides exploded view diagrams, showcasing each component’s location and corresponding reference number. These diagrams are invaluable for identifying parts during repairs or maintenance. Karcher also offers downloadable operating instructions manuals, which frequently include simplified parts illustrations.
Furthermore, Karcher-Help.com provides extensive customer care resources, including access to documentation and support. Regularly checking the official site ensures you have the most up-to-date diagrams and information for your K4 model.
Third-Party Parts Retailer Diagrams
Numerous online retailers specializing in pressure washer parts frequently offer Karcher K4 parts diagrams as a service to their customers. These diagrams, often available in PDF format, can be a convenient alternative when the official Karcher website is difficult to navigate or lacks specific details.
However, it’s crucial to verify the diagram’s accuracy by cross-referencing it with your K4’s model number. Retailers like Commercial Cleaning Equipment and others provide exploded views to help locate parts and their reference numbers.
Always exercise caution and ensure the diagram corresponds precisely to your model variant (Full Control, Premium, Compact) to avoid ordering incorrect replacement parts.
Using Model Numbers for Accurate Diagrams
Precisely identifying your Karcher K4’s model number is paramount when sourcing a parts diagram. Karcher manufactures several K4 variations – Full Control, Premium, and Compact – each with unique component layouts. A diagram for one model won’t necessarily align with another.
Locate the model number typically found on the pressure washer’s nameplate, usually on the underside or rear of the unit. When searching online, input this number alongside “Karcher K4 parts diagram” to refine results.
Retailers and Karcher’s official resources emphasize using the model number to download the correct PDF, ensuring accurate part identification and successful repairs.
Common Karcher K4 Parts & Replacements
Frequently replaced parts include O-rings, spray lances, filters, and pressure switches; diagrams pinpoint locations for efficient repairs and maintaining optimal cleaning power.
O-Rings & Seals
O-rings and seals are crucial for maintaining pressure and preventing leaks within the Karcher K4 pressure washer system. The parts diagram PDF is invaluable for identifying the correct size and placement of these small, yet vital components. Leaks commonly occur at hose connections, pump inlets, and around the spray lance.
Replacing worn or damaged O-rings is a relatively inexpensive repair that can significantly improve the washer’s performance. The diagram helps locate specific O-rings within the pump assembly and high-pressure hose. Kits containing assorted O-rings are often available, simplifying the replacement process. Always refer to the diagram to ensure you’re using the correct seal for each application, preventing further issues and ensuring a watertight seal.
Spray Lances & Extensions
Spray lances and extensions are frequently replaced due to wear and tear, or to accommodate different cleaning tasks. The Karcher K4 parts diagram PDF clearly illustrates the various lance assemblies and extension options available for your model. Identifying the correct lance component is simplified with the detailed exploded views.
Common replacements include the spray lance itself, along with nozzle holders and quick-connect fittings. Extensions provide increased reach for cleaning hard-to-access areas. The diagram aids in understanding how these components connect and disassemble for repair or replacement. When ordering, always verify compatibility with your specific K4 model number, as variations exist. Proper lance maintenance ensures optimal spray patterns and cleaning efficiency.
Filters & Water Inlet Components
Maintaining clean water flow is crucial for K4 performance, making filters and inlet components common replacement items. The Karcher K4 parts diagram PDF meticulously details the water filter location, inlet screens, and associated connections. These diagrams are invaluable for diagnosing and resolving issues related to reduced water pressure or pump performance.
Regular filter cleaning or replacement prevents debris from damaging the pump. The diagram helps identify the correct filter type for your model. Inlet components, such as the water inlet adapter, are also shown, aiding in repairs if damaged. Ensuring a clear water supply extends the lifespan of your pressure washer and maintains optimal cleaning power. Always refer to the diagram for proper assembly.
Pressure Switch & Sensors
The Karcher K4’s pressure switch and sensors are vital for regulating operation and ensuring safety. The parts diagram PDF clearly illustrates the location of the pressure switch, responsible for turning the pump on and off based on trigger activation. It also details any associated sensors that monitor system pressure and temperature.
Troubleshooting issues like the pump failing to start or running continuously often involves inspecting these components. The diagram aids in identifying the correct replacement part and understanding its connection within the system. Proper functioning of the pressure switch prevents damage to the motor and pump. Referencing the diagram ensures correct installation and restores optimal performance.

Troubleshooting with the Parts Diagram
Utilize the Karcher K4 parts diagram to pinpoint leaks, damage, or pump malfunctions, streamlining diagnostics and efficient repair processes for your washer.
Identifying Leaks & Damage
Employing the Karcher K4 parts diagram is crucial when investigating leaks. Begin by visually inspecting high-pressure hose connections, meticulously checking for any signs of water accumulation or dampness around the fittings. The diagram helps locate O-rings and seals – common leak points – allowing for targeted inspection and replacement.
Damage to the spray lance or nozzles can also be easily identified using the diagram as a reference. Look for cracks, bends, or blockages. The exploded view clarifies component relationships, making it simpler to assess if damage extends to connected parts. Carefully examine the pump assembly, referencing the diagram to understand its internal structure and potential failure areas. Consistent use of the diagram ensures accurate identification of issues, leading to effective repairs and prolonged K4 lifespan.
Diagnosing Pump Issues
Utilizing the Karcher K4 parts diagram is essential for pinpointing pump-related problems. The diagram details the pump assembly’s intricate components, enabling you to trace potential failure points. Reduced pressure often indicates issues within the pump; the diagram helps identify the pressure switch and associated sensors for testing.
If the pump fails to build pressure, inspect the water inlet filter and internal pump valves, referencing the diagram for their exact locations; Unusual noises during operation can signify worn bearings or damaged pistons – components clearly illustrated in the exploded view. The diagram facilitates understanding the pump’s operational sequence, aiding in diagnosing whether the issue stems from mechanical failure or blockage. Accurate diagnosis, guided by the diagram, ensures correct part replacement and restores optimal pump function.
Electrical Component Problems
The Karcher K4 parts diagram proves invaluable when troubleshooting electrical faults. It clearly maps the wiring harness, motor connections, and control module, allowing for systematic inspection. If the unit fails to power on, the diagram assists in tracing the power supply from the plug to the motor, identifying potential breaks or faulty connections.
A non-functioning trigger switch or pressure switch can also be diagnosed using the diagram to understand their wiring and function. Overheating issues might point to a faulty motor or damaged wiring – components visually represented in the exploded view. Always disconnect the power supply before inspecting electrical parts, and use the diagram to ensure correct reassembly after repair or replacement.
Karcher K4 Model Variations & Diagrams
Different K4 models—Full Control, Premium, and Compact—have unique parts. Specific diagrams for each variation are crucial for accurate identification and repair processes.
Karcher K4 Full Control
The Karcher K4 Full Control model boasts adjustable pressure settings via its Vario Power Spray Lance, offering versatility for various cleaning tasks. Locating a dedicated parts diagram for this version is essential, as components differ slightly from other K4 iterations. Diagrams specifically highlight the O-Ring Kit and the 0.5m Spray Lance Extension, frequently replaced parts.
Exploded views detail each assembly, using reference numbers to pinpoint specific components. These diagrams are available through Karcher’s official website and authorized retailers. When searching, ensure the diagram corresponds to the exact model number (often found on the machine’s data plate) to avoid compatibility issues. Proper identification prevents incorrect part ordering and simplifies the repair process, maximizing the lifespan of your K4 Full Control pressure washer.
Karcher K4 Premium

The Karcher K4 Premium model, known for its enhanced features and build quality, requires precise parts diagrams for effective maintenance. ManualsLib hosts the official Kärcher K 4 Premium operating instructions manual in PDF format, which often includes detailed exploded views of the pressure washer’s internal components. These diagrams are crucial for understanding the assembly and disassembly process.
Accessing these diagrams allows users to identify specific parts, like the motor and pump assembly, and their corresponding reference numbers. This is particularly helpful when ordering replacements. Karcher’s website and authorized dealers also provide model-specific diagrams. Always verify the diagram’s revision date to ensure it matches your K4 Premium’s production year, guaranteeing accuracy and successful repairs.
Karcher K4 Compact
For the Karcher K4 Compact, a streamlined pressure washer designed for portability, accessing the correct parts diagram PDF is essential for efficient repairs and upkeep. While often simpler in design than other K4 models, accurate diagrams are still vital for identifying components like the water filter, high-pressure hose connections, and spray lance assembly.
Karcher’s official website and various third-party parts retailers offer downloadable diagrams, frequently referencing specific model numbers (like 59688370). These exploded views clearly illustrate each part’s location and corresponding reference number, simplifying the ordering process. Ensure the diagram corresponds to your K4 Compact’s specific version for accurate part identification and successful maintenance.

Safety Precautions When Replacing Parts
Always disconnect the power supply and water before repairs; utilize proper tools, referencing the parts diagram PDF for correct assembly and safe operation.
Disconnecting Power Supply
Before commencing any repair or part replacement on your Karcher K4 pressure washer, absolutely prioritize disconnecting the power supply. This is a non-negotiable safety precaution to prevent electrical shock and potential injury. Locate the power cord and firmly remove it from the electrical outlet.
Furthermore, ensure the trigger gun is not depressed during this process. Even with the unit unplugged, residual pressure might remain within the hose. Referencing the Karcher K4 parts diagram PDF can help you visualize the power connection point if needed. Double-check that the power cord is completely detached before proceeding with any disassembly or component handling. This simple step significantly minimizes risk and ensures a safe working environment.
Water Supply Considerations
Alongside disconnecting the power, addressing the water supply is crucial before Karcher K4 maintenance. Always shut off the water supply to the pressure washer. Relieve any remaining pressure within the system by depressing the trigger gun until no water emerges.
Consulting the Karcher K4 parts diagram PDF will illustrate the water inlet components. Disconnect the water supply hose from the unit. Be mindful of potential water spillage and have towels readily available. Inspect the water inlet filter for debris, as a clogged filter can cause performance issues. Proper water supply management prevents unexpected sprays and ensures a safe, controlled repair process.
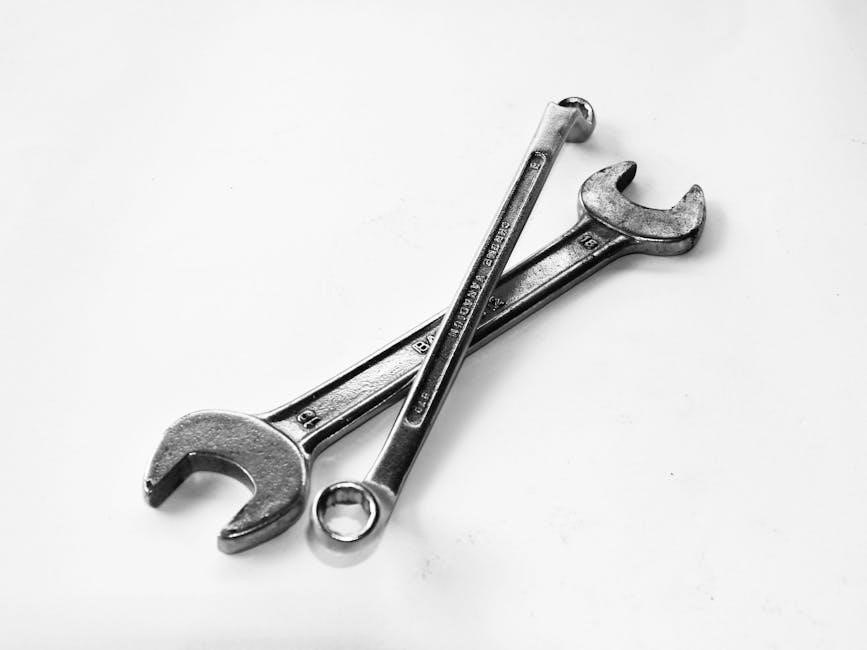
Proper Tool Usage
When disassembling your Karcher K4, referencing the parts diagram PDF is vital for identifying correct fasteners and components. Utilize appropriately sized wrenches and sockets to avoid damaging nuts and bolts. Avoid using excessive force, as plastic components are susceptible to cracking.
Screwdrivers should match the screw head type precisely to prevent stripping. A parts diagram will often highlight specialized tools needed for specific tasks. Employ penetrating oil on stubborn fasteners before attempting removal. Always wear safety glasses to protect your eyes from debris. Correct tool usage, guided by the diagram, ensures efficient repairs and prevents further damage to your K4.

Where to Purchase Karcher K4 Parts
Genuine Karcher parts are available through authorized dealers and online retailers, ensuring compatibility and quality, as referenced within the parts diagram PDF.
Authorized Karcher Dealers
Locating an authorized Karcher dealer provides access to genuine parts, expert advice, and warranty support – crucial when referencing a Karcher K4 parts diagram PDF. These dealers possess the necessary knowledge to accurately identify the correct components based on your specific model number, ensuring a perfect fit and optimal performance.
Karcher’s website features a dealer locator tool, simplifying the search process. Authorized dealers often stock a comprehensive inventory of frequently replaced parts, like O-rings, nozzles, and filters, detailed within the diagrams. Furthermore, they can assist with more complex repairs or direct you to the appropriate resources.
Purchasing from authorized sources guarantees quality and avoids potential issues associated with counterfeit or incompatible parts. The Karcher help line (800-537-4129) can also assist in finding a nearby dealer, complementing the information found in the parts diagram PDF.
Online Retailers
Numerous online retailers offer Karcher K4 parts, providing convenience and often competitive pricing when used alongside a Karcher K4 parts diagram PDF. Websites specializing in appliance parts frequently stock a wide range of components, from high-pressure hoses to replacement spray lances, all identifiable using the diagram’s reference numbers.
However, verifying the retailer’s reputation and ensuring part compatibility is crucial. Carefully cross-reference the part number from the diagram with the product description before purchasing.
Major online marketplaces also carry Karcher parts, but authenticity can be a concern. Prioritize retailers with clear return policies and positive customer reviews. Utilizing the model number alongside the diagram ensures you order the correct replacement, maximizing efficiency and avoiding costly errors.
Used Parts & Salvage Options
For budget-conscious owners, exploring used parts and salvage options can be a viable route, especially when referencing a Karcher K4 parts diagram PDF. Online auction sites and appliance repair forums often feature listings for used Karcher components, potentially offering significant savings.
However, exercise caution when purchasing used parts. Thoroughly inspect the item’s condition, if possible, and inquire about its history. The parts diagram is invaluable here, allowing you to confirm the component’s compatibility and identify potential wear or damage.
Salvaging parts from a non-functional Karcher K4 unit can also be cost-effective, but requires mechanical aptitude and careful disassembly guided by the diagram. Always prioritize safety and ensure the unit is disconnected from power before attempting salvage.

Understanding Exploded View Diagrams
Exploded views, found within the Karcher K4 parts diagram PDF, visually break down assemblies, using reference numbers to identify each component for repair.
Interpreting Reference Numbers
Reference numbers are crucial when using a Karcher K4 parts diagram PDF. Each component within the exploded view is assigned a unique number, acting as an identifier for ordering replacements or understanding assembly. These numbers correlate directly with parts lists, allowing precise identification of the required item.
When sourcing parts, always confirm the reference number matches the diagram for your specific K4 model variation – Full Control, Premium, or Compact – as components can differ. Retailers utilize these numbers for accurate order fulfillment. Diagrams often include revision dates; ensure you’re using the most current version to avoid discrepancies. Understanding these numbers streamlines repairs and ensures compatibility, preventing incorrect part purchases and frustrating delays.
Assembly & Disassembly Guidance
Karcher K4 parts diagram PDFs aren’t just for identifying components; they offer visual assembly and disassembly guidance. Exploded views illustrate the order in which parts connect, crucial for reassembly after maintenance or repair. While diagrams don’t provide step-by-step instructions, they clearly show the relationship between parts, aiding understanding of the machine’s internal structure.
Before disassembly, carefully study the diagram to familiarize yourself with the component arrangement. Note the orientation of parts like seals and O-rings. During reassembly, refer back to the diagram to ensure correct placement and tightening. Remember safety precautions – disconnect power and relieve pressure before working on the unit. Diagrams are invaluable for tackling complex repairs confidently.
Diagram Revision Dates
Karcher K4 parts diagram PDFs often include revision dates, a critical detail frequently overlooked. These dates indicate when the diagram was last updated, reflecting potential design changes or part revisions. Using an outdated diagram can lead to incorrect part ordering or improper assembly, causing malfunctions or safety hazards. Always prioritize diagrams with the latest revision date available.
Manufacturers regularly update diagrams to reflect improvements or address identified issues. Checking the date ensures you’re working with the most accurate information. If multiple versions exist, select the one corresponding to your K4 model’s manufacturing date. Ignoring revision dates risks incompatibility and compromised performance, so diligent verification is essential for successful repairs.
Be First to Comment