
A seam allowance is the extra fabric added around pattern edges, ensuring proper stitching and fit; It prevents fraying and allows for adjustments, making it essential for garment construction.
1.1 What is a Seam Allowance?
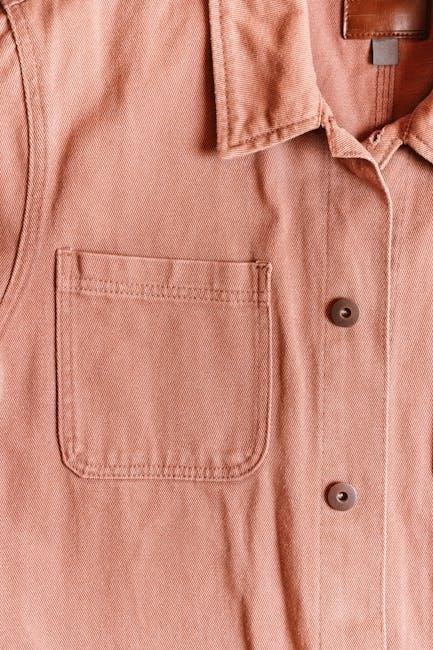
A seam allowance is the extra fabric added around the edges of a pattern piece. It is the space between the stitching line and the cutting line, allowing for proper fit, adjustments, and preventing fraying. Standard allowances often range from 1/4 to 5/8 of an inch, depending on fabric type and garment requirements. This space ensures clean finishing and durability of the seams.
1.2 Importance of Seam Allowance in Garment Construction
Seam allowances are crucial for preventing fraying, ensuring proper fit, and enabling adjustments. They provide space for stitching, finishing, and alterations, enhancing garment durability and appearance. Adequate allowances prevent weak seams and ensure longevity, making them vital for professional-looking results in garment construction.
Standard Seam Allowances
Standard seam allowances typically range from 1/4 to 5/8 inches, with 1/2 inch being common for general sewing. Medium-weight fabrics often use 5/8 inch, while quilts may use 1/4 inch. These measurements ensure consistent stitching and finishing across various projects.
2.1 Common Seam Allowances for Different Fabrics
Seam allowances vary based on fabric type. Medium-weight fabrics typically use 5/8 inch, while delicate fabrics may require 1/4 inch. Heavy fabrics like denim often use 1/2 inch. Quilts commonly use 1/4 inch, and stretch or knit fabrics may need smaller allowances to prevent distortion. These standards ensure proper fit and durability for different materials.
2.2 Specialty Seam Allowances
Specialty seam allowances cater to unique needs. For example, curved seams may require smaller allowances to reduce bulk and prevent puckering. Heavy or thick fabrics often use wider allowances for stability, while stretch fabrics may need narrower ones to maintain flexibility. These adjustments ensure seams lie flat and maintain the integrity of the garment’s design and functionality.
2.3 Industrial Seam Allowance Standards
Industrial seam allowances follow strict standards for consistency and durability. Typically, allowances range from 1/2 inch to 1 cm, ensuring strength in high-stress applications. These standards minimize variability, enabling efficient production lines and reducing defects. Specialized tools and automated systems maintain precise allowances, crucial for large-scale manufacturing and ensuring long-lasting, professional-grade garments.
Measuring and Marking Seam Allowances
Accurate measurement and marking are crucial for consistent seams. Use tools like seam gauges or magnetic guides to ensure precision. Transfer allowances from patterns to fabric neatly, ensuring accuracy for clean, professional results.
3.1 Tools for Accurate Seam Allowance Measurement
Essential tools for accurate seam allowance measurement include magnetic seam guides, which align fabric edges, and seam allowance gauges, designed for precise marking. Using adhesive tape on your sewing machine or a quilting guide bar ensures consistent stitching. These tools prevent errors, streamline the sewing process, and maintain professional results in garment construction.
3.2 Transferring Seam Allowances from Pattern to Fabric
Accurately transferring seam allowances involves marking the fabric with tools like pattern notchers or rotary cutters. Use chalk or tracing wheels to outline edges. For precision, align the pattern’s edges with the fabric and ensure marks are visible. This step ensures that the seam allowance is consistent, preventing errors during sewing and maintaining the integrity of the garment’s design.
Factors Influencing Seam Allowance
Fabric type, weight, and design requirements influence seam allowances. Heavier fabrics need larger allowances, while delicate fabrics require smaller ones. Pattern specifications and desired fit also play a role.
4.1 Fabric Weight and Type
Fabric weight and type significantly impact seam allowances. Medium-weight fabrics typically use 5/8″ or 1/2″ allowances. Heavier fabrics may require larger allowances for stability, while delicate fabrics need smaller ones to avoid bulk. Stretch fabrics, like knits, often demand specialized handling to maintain elasticity and fit.
4.2 Pattern Specifications
Pattern specifications often dictate seam allowances, varying by brand or design. Commercial patterns like Simplicity and Butterick usually include allowances, while Burda Style may not. It’s crucial to check instructions, as some require adding allowances during cutting, especially for self-drafted patterns or after adjustments. Always follow the pattern’s guidelines to ensure accurate construction.
4.3 Design and Fit Considerations
Design and fit heavily influence seam allowance decisions. Larger allowances provide room for fit adjustments, while smaller ones suit tight spaces. Curved seams often require reduced allowances to prevent bulk. Proper pressing and serging techniques ensure allowances don’t compromise the garment’s fit or aesthetic. Balancing these factors is key to achieving both functionality and a polished finish in garment construction.
Working with Different Fabrics
Seam allowances vary based on fabric type, with delicate fabrics requiring smaller allowances and heavy fabrics needing larger ones. Special techniques and tools ensure durability and prevent fraying or puckering.
5.1 Delicate Fabrics
For delicate fabrics, a smaller seam allowance of 1/4 inch is often recommended to minimize bulk and prevent tearing. Techniques like French seams or zigzag stitching can help finish seams neatly. Use sharp scissors or rotary cutters for precise cuts, and handle the fabric gently to avoid distortion. Stabilizers or interfacing may be used to add strength without compromising the fabric’s drape or texture.
5.2 Heavy or Thick Fabrics
For heavy fabrics, use a larger seam allowance, typically 5/8 inch, to accommodate thickness. This prevents bulk and ensures strong seams. Tools like a walking foot or Teflon foot help manage thick layers. Trimming excess fabric and pressing seams flat can reduce bulk and achieve a professional finish, ensuring durability and a smooth appearance in the final garment.
5.3 Stretch and Knit Fabrics
For stretch fabrics, a slightly smaller seam allowance (1/4 inch) is often used to reduce bulk. Use stretch needles and walking feet for smooth stitching. Serging is ideal for clean finishes. Press seams flat or with steam to set stitches. This ensures elasticity and prevents breaking, maintaining comfort and durability in knit garments. Always test fabric stretch before sewing.
Tools and Accessories for Managing Seam Allowances
Essential tools include seam allowance gauges for precise measurements and magnetic guides for consistent stitching. Accessories like adhesive tapes or specialized feet enhance accuracy, ensuring professional results in sewing projects.
6.1 Seam Allowance Gauges
A seam allowance gauge is a small, precise tool designed to measure and mark consistent seam allowances. It typically features multiple measurement markings, such as 1/4″, 1/2″, and 5/8″, allowing for quick adjustments. This handy device ensures accuracy when cutting fabric or sewing, making it an essential accessory for maintaining professional results in garment construction and quilting projects alike.
6.2 Sewing Machine Feet
Sewing machine feet are essential for maintaining consistent seam allowances. Specialty feet, like edge-joining or Teflon feet, help guide fabric smoothly, ensuring accurate stitching. A walking foot or even feed foot is ideal for thick fabrics, preventing bunching. These tools enhance control, making it easier to sew straight lines and maintain precise seam allowances, especially for beginners or when working with challenging materials.
6.3 Notions and Accessories
Various notions and accessories simplify managing seam allowances; Magnetic seam guides and adhesive tapes help maintain consistency, while rulers and measuring tools ensure accuracy. Pattern notchers mark seam widths, and specialized scissors aid precise cutting. These tools enhance control and precision, making it easier to work with different fabrics and maintain consistent seam allowances throughout your projects.
Common Mistakes and Solutions
Common mistakes include inconsistent seam allowances, not finishing seams, and ignoring pattern instructions. Solutions involve accurate measuring, using guides, and following patterns to ensure professional results.
7.1 Inconsistent Seam Allowances
Inconsistent seam allowances can lead to poor fit and structural issues. To avoid this, use a seam allowance guide or machine foot, ensuring uniform measurements. Adding tape marks on your machine helps maintain consistency, while pattern notchers clarify seam width, preventing irregularities and ensuring professional finishes in garment construction.
7.2 Not Finishing Seam Allowances
Not finishing seam allowances can lead to fraying and weaken seams. To prevent this, use methods like zigzag stitching, serging, or binding. These techniques protect fabric edges, ensuring durability and a professional finish. Neglecting this step risks seam degradation, especially in high-stress areas, compromising the garment’s longevity and appearance over time.
7.3 Ignoring Pattern Instructions
Ignoring pattern instructions can lead to incorrect seam allowances, causing fit issues and construction problems. Patterns often include specific allowances, and deviating without adjustment risks misalignment or improper fit. Always follow guidelines, as some patterns, like Burda, exclude seam allowances, requiring manual addition. Neglecting this step can result in garments that are too tight or too loose, compromising the final result.

Serger Use and Seam Allowance
Serging is a method to finish seams neatly, preventing fraying and enhancing garment longevity. It allows for precise handling of seam allowances, ensuring clean, professional results.
8.1 Serging Seam Allowances
Serging seam allowances is a process that trims and finishes fabric edges simultaneously, preventing fraying. This method is particularly effective for delicate, stretchy, or heavyweight fabrics. By using a serger, you can achieve clean, professional finishes on seams, ensuring durability and a polished look in garments. It’s a time-saving technique that enhances overall construction quality.
8.2 Benefits of Serging
Serging offers multiple benefits, including preventing fabric fraying, reducing bulk in seams, and creating a professional finish. It enhances durability, especially for garments subject to stress or repeated washing. Serging also saves time by trimming and finishing seams in one step, making it ideal for both delicate and heavy fabrics. This technique is essential for achieving clean, long-lasting results.

Advanced Seam Allowance Techniques
Advanced techniques include adjusting allowances for fit, incorporating design elements, and reducing bulk in seams. These methods ensure tailored results while maintaining durability and aesthetic appeal. Precision is key.
9.1 Adjusting for Fit
Adjusting seam allowances for fit involves modifying the fabric edges to ensure garments are neither too tight nor too loose. This technique allows for customization, enabling tailoring to individual body types. By tweaking the allowance, sewists can achieve a perfect fit, ensuring comfort and a polished appearance. Precision is crucial during this process.
9.2 Design Elements
Seam allowances play a key role in incorporating design elements. They allow for creative techniques like ruffles, gathers, and intricate stitching. By adjusting the allowance, designers can enhance or minimize specific features, ensuring aesthetic appeal. Proper handling of allowances ensures that design details remain intact without compromising functionality or fit, making them a vital aspect of creative garment construction.
9.3 Reducing Bulk in Seams
Reducing bulk in seams involves techniques like trimming, clipping, or using thinner fabrics. Trimming seam allowances diagonally at corners and layering fabrics strategically can minimize thickness. Adjusting the seam allowance size, especially around curves, ensures smoother results. These methods prevent puckering and tightness, enhancing both comfort and the garment’s professional finish.
Troubleshooting Seam Allowance Issues
Identify and address issues like puckering or gapping by adjusting seam allowances. Ensure accurate measurement and consistent sewing practices to resolve common problems effectively.
10.1 Puckering or Gaping
Puckering occurs when fabric gathers excessively, while gaping results from insufficient fabric. Both issues often stem from incorrect seam allowances or improper pressing. To resolve, adjust the allowance to match the fabric type and ensure even stitching. Using tools like seam gauges can help maintain consistency and prevent these common problems during garment construction.
10.2 Adjusting Allowances
Adjusting seam allowances ensures a perfect fit and prevents issues like puckering or gapping. If fabric frays or is too bulky, reduce the allowance slightly. Use a seam allowance gauge to measure accurately and maintain consistency. Trimming excess fabric after stitching can also help achieve smooth, professional-looking seams without compromising strength or flexibility.
10.3 Pressing Techniques
Proper pressing is crucial for professional finishes. Press seams flat before opening to set the stitches. For bulky fabrics, press seams open and trim excess. Use steam to shape curves and corners, ensuring smooth lay. Pressing techniques help maintain seam stability and prevent puckering, enhancing the overall appearance and durability of the garment. Consistent pressing achieves polished results.
Case Studies and Examples
Real-world examples highlight successful seam allowance application, such as a tailored dress with precise 5/8″ allowances or a quilt with consistent 1/4″ seams, ensuring professional finishes and durability.
11.1 Successful Seam Allowance Application
A tailored dress project exemplifies effective seam allowance use, employing 5/8″ allowances for clean finishes. By maintaining consistent measurements, the garment achieved a professional fit and durability, demonstrating how proper seam allowances enhance both aesthetics and functionality in sewing projects.
11.2 Lessons Learned
One sewer shared that ignoring pattern instructions led to inconsistent seams. Adjusting allowances post-construction was challenging. This highlighted the importance of precise measurements and adhering to guidelines, ensuring garments fit well and withstand wear, reinforcing seam allowances’ critical role in successful sewing projects.
Seam allowances are crucial for preventing fraying and ensuring proper fit. Tools and techniques simplify their management, fostering durability and a professional finish in every garment.
12.1 Summary of Key Points
A seam allowance is essential for preventing fraying and ensuring proper fit. It varies by fabric type, with tools like gauges and guides aiding accuracy. Techniques such as serging and pressing enhance durability. Proper management of seam allowances avoids bulk and ensures professional finishes, making them a cornerstone of successful garment construction and alterations.
12.2 Encouragement for Consistent Use
Consistent seam allowances are key to achieving professional results. By mastering this skill, you ensure a flawless fit and durability in every garment. Use tools like seam gauges and guides to maintain accuracy. Over time, this practice becomes second nature, boosting your confidence and the quality of your sewing projects. Embrace consistency for truly professional outcomes every time.
Be First to Comment