
Craftsman Garage Door Opener Instruction Manual: A Comprehensive Guide
Welcome to the Craftsman Center! This manual provides detailed guidance for installation, operation, maintenance, and troubleshooting of your Craftsman garage door opener, ensuring years of reliable service.
Craftsman garage door openers represent an iconic American brand with a legacy stretching back to 1927, consistently delivering quality and innovation to homeowners. These openers are designed for reliability and ease of use, enhancing the security and convenience of your home.
From basic chain-drive models to advanced belt-drive systems with smart home integration, Craftsman offers a diverse range to suit various needs and budgets. Recent investments, like the new Fort Worth, Texas manufacturing facility, demonstrate a commitment to American-made quality.
This manual will guide you through every aspect of your opener, ensuring optimal performance and longevity. Whether you’re installing a new unit or performing routine maintenance, we’re here to support your projects.
Safety Precautions
Prioritize safety during installation and maintenance! Garage door openers involve powerful mechanisms; disconnect power before any work. Never allow children to operate the opener or play near the door. Regularly test safety sensors to ensure they prevent the door from closing on obstructions – a critical safety feature.
Avoid wearing loose clothing or jewelry that could become entangled. Do not attempt repairs beyond your skill level; consult a qualified technician. Be mindful of pinch points during operation and manual release.
Always follow all warnings and instructions in this manual and on the opener itself. Ignoring these precautions could result in serious injury or damage.
Understanding Your Craftsman Opener Model
Familiarize yourself with your specific Craftsman opener! Since 1927, Craftsman has been a trusted American brand, and your opener is designed for durability and performance. Begin by identifying your model number – it’s crucial for accessing specific support and parts.
The key components include the opener unit, rail system, safety sensors, wall control, and remote controls. Understanding how these interact is vital. Different models may offer smart home integration features, allowing control via a mobile app.
Refer to the diagrams in this manual to locate each component and understand its function.
Identifying Your Specific Model Number
Locating your Craftsman garage door opener’s model number is essential! This unique identifier unlocks access to tailored support, replacement parts, and specific instructions. The model number is typically found on a sticker affixed to the opener unit itself.
Carefully inspect the unit’s housing – look on the side, top, or back. It’s often near the motor or control panel. Note the complete number, including any letters or dashes.
Having this number readily available when contacting Craftsman support or ordering parts will streamline the process significantly.
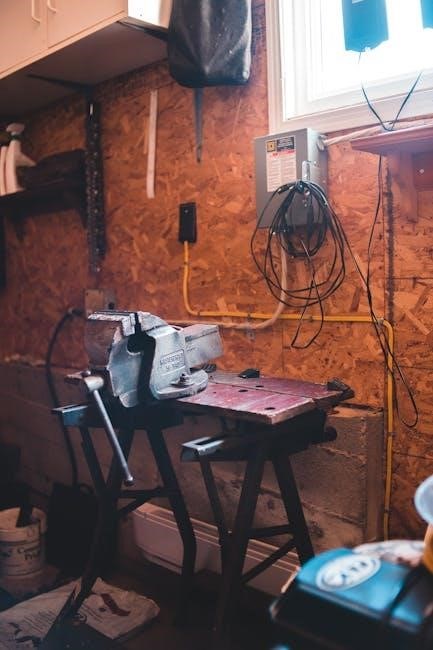
Key Components of the Opener System
Understanding the core components is vital for successful operation and maintenance. The system includes the opener unit housing the motor and controls, a rail system transmitting power to the door, and a door bracket connecting the opener to the garage door itself.
Safety sensors, crucial for preventing accidental closures, are also key. Remote controls and a wall control panel provide convenient operation. The emergency release mechanism allows manual door control during power outages.
Each component plays a critical role in the overall functionality and safety of your Craftsman opener.
Installation Guide
Proper installation is paramount for safe and efficient operation. Begin by carefully unpacking all components and verifying against the parts list. Ensure the garage door is balanced and moves freely before commencing installation. This guide details mounting the opener unit securely to ceiling joists, utilizing appropriate hardware for stability.
Next, attach the rail system, aligning it precisely with the door’s travel path. Secure all connections tightly, following the provided diagrams. Double-check all mounting points for firmness before proceeding to the programming stage.
Preparing for Installation
Before you begin, disconnect the garage door from the manual release. Verify the door is balanced – it should stay open at roughly halfway and close smoothly. Clear the garage space, removing any obstructions from the door’s path and the installation area. Gather necessary tools: ladder, drill, sockets, and a level.
Inspect the ceiling joists to ensure they can support the opener’s weight. If reinforcement is needed, consult a professional. Review all included safety precautions and familiarize yourself with the components. A well-prepared workspace ensures a smoother, safer installation process.
Mounting the Opener Unit
Position the opener unit carefully, ensuring adequate clearance for the door’s travel. Utilize the provided mounting brackets, securely attaching them to the ceiling joists with lag screws. Confirm the brackets are level and firmly fastened – this is crucial for stable operation.
Lift the opener unit onto the brackets, aligning the mounting holes. Secure the unit with bolts and washers, tightening them firmly. Double-check all connections to prevent vibration and ensure safety. Proper mounting minimizes noise and maximizes the lifespan of your Craftsman opener.
Attaching the Rail System
Begin by assembling the rail sections according to the diagram, ensuring all connections are secure. Attach the rail to the opener unit, aligning the motor’s drive sprocket with the rail’s opening. Fasten the rail firmly using the provided hardware, verifying proper alignment for smooth operation.
Extend the rail towards the garage door, supporting it with temporary bracing. Connect the rail sections, ensuring they are level and securely joined. Proper rail installation is vital for efficient and quiet door movement, contributing to the longevity of your Craftsman system.
Programming and Adjustment
Proper programming and adjustment are crucial for optimal performance and safety. Begin by setting the travel limits – up and down – to match your garage door’s height, preventing over-travel. Next, carefully adjust the force settings, ensuring the door reverses upon encountering an obstruction, safeguarding against damage or injury.
Programming the remote controls is straightforward, typically involving pressing a learn button on the opener unit and then a button on the remote. Regularly test these settings to confirm functionality and maintain a secure, smoothly operating garage door system.
Setting Travel Limits
Accurate travel limit settings are essential for preventing your garage door from hitting the ceiling or stopping short of the floor. Locate the adjustment screws on the opener unit, typically labeled “Up” and “Down.” Use small increments while testing the door’s movement after each adjustment.
Start with minimal adjustments and observe the door’s full range of motion. The “Up” limit defines how far the door opens, while the “Down” limit controls how far it closes. Precise settings ensure smooth, safe operation and prevent unnecessary strain on the opener mechanism.
Adjusting Force Settings
Proper force settings are crucial for safety; they dictate how much power the opener uses to overcome resistance when opening or closing the door. Locate the force adjustment dials, usually marked with “Up” and “Down” settings. Begin with the lowest setting and incrementally increase it until the door operates smoothly without struggling.
Avoid excessive force, as it can damage the door or opener and compromise safety features. Regularly check these settings, especially after any adjustments to the door’s springs or hardware, ensuring optimal performance and preventing potential hazards.

Programming the Remote Controls
To pair new remotes, locate the “Learn” button on the opener unit – it’s typically yellow or orange. Press and release this button, initiating a 30-second programming window. Within this timeframe, press and hold the desired button on your remote until the opener light flashes, confirming successful programming.
Repeat this process for each additional remote. If programming fails, ensure the remote batteries are fresh and there’s no interference. Refer to your specific model’s instructions for any unique programming sequences or troubleshooting steps.
Troubleshooting Common Issues
If the opener isn’t responding, first check the power supply and ensure it’s properly connected. Verify the wall control batteries are functional and the safety sensors are aligned. A reversing door often indicates a safety sensor misalignment – inspect them for obstructions or proper positioning.
Noisy operation could stem from loose parts; inspect the rail system and tighten any bolts. Regular lubrication, as detailed in the maintenance section, can also significantly reduce noise. If issues persist, consult the warranty information or contact Craftsman support for assistance.
Opener Not Responding
If your Craftsman opener fails to respond, begin by verifying the electrical power supply. Ensure the unit is plugged in securely and the circuit breaker hasn’t tripped. Check the wall control panel’s batteries, replacing them if necessary. Confirm the remote control batteries are also fresh and functioning correctly.
Inspect the safety sensors; a broken beam will prevent operation. Finally, examine the disconnect switch – ensure it hasn’t been accidentally activated. If these steps don’t resolve the issue, further diagnostics may be required.
Door Reverses Unexpectedly
Unexpected door reversal often indicates a problem with the safety sensors or force settings. First, verify the safety sensors are properly aligned and free from obstructions. Even slight misalignment can trigger the reversal mechanism. Next, check the opener’s force settings; if set too low, the opener may interpret minor resistance as an obstruction.
Adjust the force settings incrementally, testing after each adjustment. A malfunctioning safety sensor or a binding door can also cause this issue, requiring further inspection and potential repair.
Noisy Operation
Excessive noise during operation typically stems from insufficient lubrication or worn components. Begin by lubricating all moving parts – the rail, rollers, hinges, and springs – with a suitable garage door lubricant. A rattling sound could indicate loose hardware; tighten all bolts and nuts securely.
If the noise persists, inspect the rail system for dents or obstructions. Worn rollers or a failing opener motor may also contribute to the noise, potentially requiring replacement. Regular maintenance significantly reduces operational noise and extends the opener’s lifespan.
Remote Control Operation
Your Craftsman garage door opener utilizes remote controls for convenient access. To pair a new remote, locate the “Learn” button on the opener unit – typically yellow or orange – and press it. Within 30 seconds, press and hold the button on your remote until the opener activates, confirming successful pairing.
If the remote fails to function, first check the battery. Replace it with a fresh one, ensuring correct polarity. Interference from other devices can sometimes disrupt the signal; try moving closer to the garage door. If issues continue, re-pair the remote following the steps above.

Pairing New Remotes

To successfully pair a new Craftsman remote to your garage door opener, begin by locating the “Learn” button on the motor unit itself. This button is usually yellow or orange and is often found on the back or side of the unit. Press and release this “Learn” button – a small indicator light will illuminate.
Within the 30-second window following the button press, firmly press and hold the button on the new remote control you wish to pair. Continue holding the remote’s button until the garage door opener activates, indicating a successful connection. The indicator light will typically blink or turn off to confirm pairing.
Replacing Remote Batteries
Maintaining your Craftsman remote’s battery life is crucial for consistent operation. When the remote’s range diminishes or it fails to activate the door, it’s time for a battery replacement. Typically, Craftsman remotes utilize a CR2032 button cell battery, though some models may vary – consult your specific remote’s documentation.
Carefully open the remote’s casing, often by sliding or gently prying it open. Remove the old battery, noting its orientation, and insert the new battery with the positive (+) side facing up. Securely reassemble the remote casing, ensuring a snug fit to protect the battery and internal components. Test the remote’s functionality immediately.
Wall Control Operation
The wall-mounted control panel serves as a primary method for operating your Craftsman garage door opener. A single press of the “Open” or “Close” button initiates the corresponding door movement. The panel features a “Stop” button, immediately halting the door’s operation – a vital safety feature.
Indicator lights on the panel provide operational status. A flashing light may indicate a safety sensor issue or programming need. Ensure the wall control is securely mounted and accessible, but out of reach of children. Regular testing of the wall control ensures continued functionality and peace of mind.
Maintenance and Care
Regular maintenance is crucial for ensuring the longevity and smooth operation of your Craftsman garage door opener. Periodic lubrication of moving parts – the rail, rollers, and springs – minimizes friction and noise. Inspect the rail system for any signs of damage or debris accumulation, clearing obstructions promptly.
Visually check the entire system for loose bolts or worn components. Tighten any loose hardware and replace damaged parts immediately. A well-maintained opener operates safely and efficiently, preventing costly repairs and extending its lifespan, supporting your projects and garage needs.
Regular Lubrication
Consistent lubrication is paramount for a smoothly functioning Craftsman garage door opener. Apply a silicone-based lubricant – avoid oil-based products – to the rail system, focusing on the rollers and any contact points. This reduces friction, minimizing noise and strain on the motor.
Lubricate the springs cautiously, ensuring you don’t disassemble them. A light coating is sufficient. Inspect the chain or belt drive, applying lubricant as needed. Regularly lubricating these components extends the opener’s life, ensuring reliable performance and preventing premature wear, supporting your daily routines.
Inspecting the Rail System
Thoroughly inspect the Craftsman garage door opener’s rail system quarterly for any signs of damage or wear. Look for bends, cracks, or loose connections along the rail’s length. Ensure all bolts and nuts are securely tightened, preventing unwanted vibrations and potential failures.
Check the rollers for smooth operation, replacing any that are cracked or worn. Examine the chain or belt for fraying or stretching. Regular inspection identifies potential issues early, preventing costly repairs and ensuring the safety and reliability of your garage door system, maintaining seamless access.
Safety Sensors: Alignment and Testing
Crucially, Craftsman garage door openers feature safety sensors that prevent the door from closing on obstructions. Regularly verify proper alignment; the sensors should face each other with a clear, unobstructed path. Test functionality monthly by placing an object in the door’s path while closing. The door should immediately reverse.
If the door fails to reverse, or the sensors’ indicator lights aren’t solid, realign or clean the lenses. Ensure nothing interferes with the beam – even small items can cause issues. Proper sensor operation is vital for safety, protecting people and property from potential harm.
Understanding Safety Sensor Functionality
Craftsman garage door safety sensors utilize an infrared beam to detect obstructions during door travel. These sensors, typically located near the floor on either side of the door opening, create an invisible barrier. If this beam is broken – by a person, object, or even debris – the opener immediately reverses the door’s direction.
This crucial safety feature prevents potential injuries and damage. The sensors work in tandem; both must receive the signal for normal operation. Solid indicator lights on each sensor confirm proper function. Understanding this system is key to maintaining a safe garage environment.
Troubleshooting Safety Sensor Issues
If your Craftsman opener isn’t responding, or the door reverses unexpectedly, safety sensors are often the culprit. First, visually inspect the sensors for obstructions like dirt, cobwebs, or misaligned lenses. Clean the lenses with a soft cloth. Ensure the sensors are firmly mounted and facing each other.
Check the indicator lights; a blinking light usually signals a problem. If alignment is off, gently adjust the sensor brackets until the lights are solid. Refer to your model’s wiring diagram to confirm proper connections. Persistent issues may require professional assistance.
Emergency Release Mechanism

The emergency release allows manual operation if power is lost or the opener malfunctions. Locate the pull cord hanging from the rail; pulling it disengages the carriage. Exercise caution as the door will be unassisted and could fall rapidly. Support the door during operation to prevent injury or damage.
To re-engage the opener, pull the cord towards the opener unit until it clicks. Verify the carriage is securely reconnected before using the opener. Regularly test the release mechanism to ensure it functions correctly. Never leave the door in a partially open position after manual operation.
How to Manually Operate the Door
After disengaging the emergency release, carefully lift the garage door. Be prepared for the door’s weight, as it will no longer be assisted by the opener. Use both hands and maintain a firm grip throughout the process. Lift slowly and steadily, watching for any obstructions. If the door feels heavy or difficult to lift, seek assistance.
Control the descent by gently lowering the door, maintaining a consistent speed. Avoid letting go abruptly, as this could cause damage or injury. Ensure the door is fully closed before attempting to re-engage the opener. Remember to support the door during the entire manual operation.
Re-engaging the Opener After Manual Operation
To re-engage the Craftsman opener, pull the emergency release cord firmly towards the opener unit. You should hear a distinct click, indicating the trolley is reconnected to the rail system. Gently test the door’s operation using the wall control button. If the door doesn’t respond, double-check the connection and ensure the safety sensors are aligned.
Avoid forcing the opener to engage, as this could cause damage. Confirm the door moves smoothly and reverses properly with the safety sensors. Regularly test the emergency release and re-engagement mechanisms to ensure they function correctly for safety and convenience.
Smart Home Integration (If Applicable)
Certain Craftsman garage door openers offer smart home connectivity, allowing control via Wi-Fi and a dedicated mobile app. To connect, download the Craftsman app and follow the on-screen instructions to link your opener to your home network. This enables remote operation, real-time status updates, and customized scheduling.
Explore features like receiving notifications when the door opens or closes, and creating temporary access codes for guests; Integration with voice assistants may also be available, providing hands-free control. Ensure a stable Wi-Fi connection for optimal performance and security.
Connecting to Wi-Fi
Before starting, ensure your Wi-Fi network is 2.4 GHz compatible, as many openers do not support 5 GHz. Download the Craftsman app on your smartphone or tablet and create an account. Enter the app’s setup mode, typically by pressing and holding a button on the opener unit itself – consult your model’s specific instructions.

The app will scan for nearby networks; select yours and enter the password. Follow the on-screen prompts to complete the connection process. A successful connection is usually indicated by a solid Wi-Fi indicator light on the opener. Troubleshooting may involve restarting the opener and router.
Using the Craftsman App
Once connected, the Craftsman app offers remote control of your garage door, allowing you to open and close it from anywhere. You can create schedules for automatic operation, enhancing security and convenience. The app also provides real-time status updates, notifying you if the door is open or closed.
Explore the app’s settings to customize features like travel limits and safety sensor sensitivity. Receive alerts for unusual activity, such as prolonged door openings. The app streamlines maintenance by providing access to troubleshooting guides and parts ordering information, ensuring a seamless user experience.
Warranty Information
Craftsman stands behind its garage door openers with a comprehensive warranty, reflecting our commitment to quality and durability. The opener is typically covered by a limited lifetime warranty on the motor, ensuring long-term performance. Additionally, parts and components are usually warranted for a specific period, often one to two years, against manufacturing defects.
To maintain warranty validity, proper installation and regular maintenance are crucial. Retain your proof of purchase for warranty claims. Visit the Craftsman website or contact customer support for detailed warranty terms and conditions, and to initiate a claim if needed.
Frequently Asked Questions (FAQ)
Q: Why won’t my opener respond? A: Check the power supply, safety sensors, and remote batteries. Q: What if the door reverses unexpectedly? A: Adjust the force settings or inspect the safety sensors for obstructions. Q: How do I pair a new remote? A: Refer to the ‘Remote Control Operation’ section for detailed pairing instructions.
Q: Where can I find compatible replacement parts? A: See the ‘Parts Replacement Guide’ section. Q: Is professional installation required? A: While DIY installation is possible, professional installation is recommended for optimal performance and safety.
Contacting Craftsman Support
For assistance with your Craftsman garage door opener, our dedicated support team is readily available. You can connect with us through the Craftsman Center online community section, accessing FAQs and engaging with fellow customers. We’re committed to supporting your projects and maximizing your tool’s potential.
Visit our website for detailed contact information, including phone numbers and email addresses. We also offer live chat support during business hours. Don’t hesitate to reach out – we’re here to help you resolve any issues and ensure a seamless experience with your Craftsman opener!
Parts Replacement Guide
Maintaining your Craftsman garage door opener is crucial for longevity. When replacement parts are needed, finding compatible components is straightforward. Utilize the model number located on your opener unit to ensure accurate part selection. Online resources and authorized Craftsman dealers offer a wide range of replacement parts.

Ordering is simplified through our website or by contacting customer support. Always verify the part number before finalizing your purchase. Proper installation is essential; consult the instruction manual or seek professional assistance if needed. Genuine Craftsman parts guarantee optimal performance and safety.
Finding Compatible Parts
Locating the correct replacement parts for your Craftsman garage door opener begins with identifying your specific model number. This number is typically found on a sticker affixed to the opener unit itself. Once you have this, accessing compatible parts is easy. The official Craftsman website features a parts finder tool, allowing you to input your model number for a tailored list.
Alternatively, authorized Craftsman dealers can assist in identifying the correct parts. Ensure the part number matches exactly to guarantee compatibility and proper functionality. Using incorrect parts can compromise safety and performance.

Ordering Replacement Parts
Once you’ve identified the compatible part number, several options exist for ordering replacements. The Craftsman website offers direct online ordering with convenient shipping options. Authorized Craftsman dealers also stock a wide range of parts and can provide expert assistance with your order.
When ordering, double-check the part number and quantity to avoid delays. Keep your original purchase information handy, as it may be required for warranty claims. Be aware of potential shipping costs and estimated delivery times. Secure online payment methods are recommended for safe transactions.
Be First to Comment